Showing posts with label Under $15. Show all posts

Friday, August 10, 2012

Baked Branzino

My husband is picky with seafood.  I might have mentioned that before.  He is more picky than our 3 year old daughter who when asked what food she likes proudly responds, "fish and rice!"  But finally, for the record, I got dear husband to eat fish off a baked whole branzino that I cooked.  What I mean is usually he would only eat filleted fish.  For some reason he cannot stomach the sight of a whole fish with head, bones and tail served on the table  However on one of our dinner dates at Angelini Osteria I was intrigued when he said he would want to try their branzino dish one day, a whole branzino baked in a crust of salt.  His comment gave me hope. I thought perhaps I could entice him with grilled whole fish in the form of branzino.  I had a feeling he would be more open to trying branzino because he saw it prepared in a fancy restaurant and also because it sounded Italian.  Silly, I know.  But I do think he is racist when it comes to fish.  No kidding.  He dislikes tilapia which he usually sees swimming inside fish tanks at the Asian market.

I brought up the suggestion one day, mentioning that I saw some fresh looking branzino at Whole Foods. However I had to promise him that if I cook it whole I would debone the fish first before plating his. He agreed.  I was smiling from ear to ear, the guy have no idea how delicious the meat is near the bones (which is going to be all mine).


So I went to Whole Foods to get the branzino.  I think it has become a regular on their iced cases.  The price was right, $11.99 a pound, and the fish had gleaming clear eyes which means they are fresh.  Each branzino ran about 1 to 1.5 lbs each.  I bought 2 pieces because I  was not confident one would be enough for the three of us considering the 3-year-old could easily eat half a fish.


Whole fish is easy to cook and cooks quickly.  You need only to drizzle some olive oil, salt and some herbs, throw it on the grill or oven and that's it.  I would prefer mine grilled but on this day we ran out of propane to fire the grill so I had to cook it in the oven.

Baked Branzino with Gremolata

1 bunch cilantro (1/2 portion coarsely chopped)
1 bunch scallions, white and green parts separated (thinly slice green parts)
1 jalapeño pepper, finely chopped
1/4 cup drained capers
2 garlic cloves, minced
1 lime, zested and juiced
1 lime, thinly sliced
extra virgin olive oil
2 whole branzino, about 1-2 lbs each, have the fishmonger scale and clean the fish
coarse sea salt and black pepper

1. Prepare the gremolata by combining the chopped cilantro, sliced scallions,  jalapeño, capers and garlic in a bowl.  Finely grate the zest of one lime and then squeeze in its juice.  Add 3 tablespoons olive oil, salt and pepper and stir to combine.  Cover and let sit until needed.

2. Cook the fish.  Heat the oven to 450 degrees. Pat dry each fish with paper towel then drizzle olive oil over each fish to coat.  Season each fish inside the cavity and outside with salt and black pepper.  Divide the lime slices, remaining cilantro sprigs, scallions (white part) between the two fish. Transfer fish to baking sheet and place in the 450° oven.  Cook fish for 15 to 20 minutes or until just opaque and flakes easily when pierced with a fork.

3. Serve fish with gremolata on top.

*A good side for this dish is a mango salsa


Tuesday, May 8, 2012

Last weekend, briefly

It was a tough weekend for me.  On Thursday I had the much dreaded talk with my boss with regards to our annual employee evaluation.

Bottom line : my bonus was lower than previous years and my increase was a measly 1%. I kid you not, I got a freakin' 1% salary increase. How much is that in dollar terms is just even more pathetic.  Negotiating for even a slight increase proved worthless, so the verdict is that I am set to find a new job.  Please, pray for me.

It took awhile for me to digest the whole thing.  Come weekend, my emotions took a dive. I was depressed at the unfairness of it all. Sadly, my poor husband and daughter had to deal with me at my worst.  All weekend long.  I hate myself for that but for some reason I just couldn't snap out of it fast enough.  We went to the movies to watch the Pirates, and  I rolled downhill with Sophia at the park in my effort to forget but it didn't do the trick. Thankfully, my husband was considerate to let me have the day to myself after church on Sunday. I am blessed to have married such a man. I love him dearly.   Him telling me "I love you" through it all was like a band-aid for my wounded spirit.   That free time helped me reflect and think things over.

My Redeemer lives. He will provide for us. I shall HOPE and place my TRUST in Him.
I shall not complain but deal with this GRACEFULLY.
I will be thankful for my job but look for better opportunities UNTIRINGLY.

On Sunday afternoon, even though my emotions was not yet 100% recovered I felt good enough to make our Sunday supper of Tuscan Roast Pork.  Cooking was actually therapeutic.  Besides, a good dinner is the least I could do for being a mess on an otherwise would have been a wonderful time to spend with my family.    


Pork Roast
(serves 4-6)

3 1/2 to 4 pounds pork shoulder roast
1/4 cup olive oil
1 medium onion, roughly chopped
3 Cloves Garlic, minced
10 oz crimini mushrooms, washed and cut in half
4 Plum Tomatoes, roughly chopped
1/2 cup Pitted Green Olives, roughly chopped
1 teaspoon Dried Thyme
2 teaspoons Dried Oregano
1 cup dry White Wine
1/4 cup chicken broth
Kosher/Seasalt Salt
Freshly ground black pepper

1. Preheat oven to 350°F.

2. Heat oil in a Dutch oven over high heat. Brown pork loin on all sides and set aside.

3. Discard all but 1 teaspoon oil from the pan.  Add onion and saute until soft.

4. Add mushrooms and cook about 3 minutes or until softened.  Add tomatoes, olives, garlic and herbs.  Cook about 3 minutes then add in the wine.  Bring to a boil and simmer for a couple of minutes.

5.  Add broth, then add back in the pork loin.  Bring to a boil then transfer to oven uncovered.

6. Cook uncovered for about 2.5 to 3 hours, turning the roast occasionally every 45 minutes or so.

7. When meat in fork tender remove from pan and set aside.  Let it rest for 5 minutes.

8.  Boil liquid in Dutch oven on stove top until sauce is thick, about 10 minutes or so.  Turn off heat.

9.  Slice roast into pieces and serve drizzled with the sauce.  (Or cut up the roast and add it back into the pot with the sauce.)

Note that you should slice the roast across the grain so it's more tender.  I made a mistake here as I wasn't really paying attention when I cut it.  Thankfully the meat was tender and moist so it was not big of a deal.


10.  Serve with baked/mashed potatoes, rice, or bread.


Tuesday, March 27, 2012

Chicken Parmesan

This is one of my favorite weeknight meals.  It is simple and delicious.  Skipping the breading process makes it easy and lower in carbs (which is good for me because I have a feeling I am borderline diabetic).  You can make it with chicken breasts as Giada De Laurentiis does but I prefer boneless chicken thighs.

{Sorry, I know I discriminate against chicken breasts in this blog.  It's not the chicken breast, it's me.  Chicken breast is good but it's just not my thing.... I am weird in that I'd eat the gizzard, the liver and the chicken heart before the chicken breast.}

Anyhow, when a recipe calls for breasts I substitute boneless thighs.  I pound it thin, to about 1/4 to 1/2 inch thick so it cooks even and quicker.  That's what I did in this recipe.  Also I never liked chicken parmesan because of the breading involved but this recipe changed that.  I happen to dislike breading, except on a very very few dishes.


The chicken in this dish always comes out moist and very flavorful.  Definitely make the marinara sauce / tomato sauce from scratch if you are not in a rush, but store bought comes out good nonetheless.

Serve with garlic bread, pasta or salad to complete the meal.

Chicken Parmesan

6 skinless, boneless chicken thighs, pound into 1/4 to 1/2 inch thickness
3 tablespoons olive oil
1 teaspoon chopped fresh rosemary leaves
1 teaspoon chopped fresh flat parsley
1/2 teaspoon dried thyme
Kosher Salt 
Freshly ground black pepper
1 1/2 cups store bought marinara sauce ( I like Trader Joes or Giada's from Target)
6 tablespoons shredded mozzarella
6 tablespoons shredded Parmesan
1 tablespoon butter cut into 6 pieces
Preheat the oven to 500 degrees F.

Mix the oil and herbs then brush it into each side of the chicken cutlets.  Season chicken with salt and pepper.  


Heat a heavy bottomed oven-proof skillet over high heat and cook the chicken until just brown about 3 minutes on each side.  Turn off heat.


Working very quickly, spoon the marinara sauce over each cutlet and around it.  After that, sprinkle 1 tablespoon mozzarella then 1 tablespoon parmesan in each cutlet.  Top each cutlet with the butter.


Place chicken in the oven and bake for about 10 to 15 minutes (3-5 minutes if using breasts) until the chicken is cooked through.


Friday, March 16, 2012

The Preschool

We have officially registered Sophia for preschool. 
What a relief!  I have been stressed out for days thinking and trying to figure out where she should go.  It was tough. 
It's either we can't afford it, it does not work with our schedules, or too far from where we live/work.  We know we needed  to compromise one or another.

We finally settled at The Preschool which our parish church started last year.  It is pricey but we decided to go ahead and bite the bullet.  Sophia has been longing to go there since we went to the open house they had last year.  At the time we decided to put off preschool for one more year because it is expensive and she was only two and a half years old, and too young to be schooled.
   
But she has been telling us, "That's my school!" every time we pass it on our way to church on Sundays.  And she said it with conviction! 


I must admit, I felt my heart ache every time she looks through the school gate and checks out the kids' arts & crafts posted on the walls.  It made me feel sad that we may not be able to afford to send her there.


We had a few other preschool choices but we felt The Preschool is what felt right.  It is close to home.
We know the people there.  The place is familiar to Sophia.  We know the director.  We see some of the kids that goes there at church.  
That it is far from both mine and my husband's job is the only issue we have.
Thankfully The Preschool was considerate of my long commute and will not charge us extra for after school care since we only need a few additional minutes before Sophia can be picked up.  That sealed the deal.  We just cannot afford to pay more on top of the tuition.  The tuition alone is expensive for us.


I'm still afraid on the dollar equivalent of this decision but I feel at peace.  God is good and He will provide.  I prayed for guidance in this decision and I have faith this is what He wills.
So Sophia begins preschool September 4th.  My little preschooler is excited and is looking forward to doing some "projects."
I love our little girl's optimism!
I need to have faith like hers and claim, "that's my ____!"

Meanwhile, hubby and I need to get our acts together and start learning how to manage our finances better.  We are cutting back on food - where we spend most.  We are a family of three and we spend about $800 a month on groceries.   That's too much I think.  That does not include my husband's daily lunch.  He eats out, which adds up and can get expensive.  

Also with our schedule, I would need to cook easier and quick meals during the week.  And this is where I will need Rachael Ray's help :)

This next recipe will definitely be added to the dinner rotation. It's a quick and impressive meal that I can whip up in 30 minutes or so. And although chicken breasts is my arch nemesis, this one is an exemption because it has great flavors and it isn't dry.

Goat Cheese Stuffed Chicken

ingredients
2 boneless, butterflied, skin-on chicken breasts
goat cheese, about 4 oz
arugula, about 1-1.5 cups
2 garlic cloves, sliced or chopped
3 sage leaves or other herbs such as rosemary, chopped
lemon
salt
freshly ground black pepper


Preheat oven to 450°F
Heat 1 tablespoon olive oil in saute pan.
Add garlic and cook until it starts to smell (before it browns).
Add arugula, salt, pepper, a squirt of lemon and saute quickly about a minute until arugula is slightly wilted.  Set aside and when cool enough chop arugula and garlic.

Make stuffing. 
Mash softened, pliable goat cheese with a spoon.
Add chopped sage, arugula & garlic then mix.
Add lemon zest & a squirt of the juice
Add salt & pepper and mix well.
Taste and check for seasoning

Stuff the chicken.
Sprinkle salt and pepper on the inner side of the chicken then  add a spoonful of the stuffing.  Seal chicken using a twine or bamboo skewers.  Sprinkle salt and pepper on the chicken.

Cook stuffed chicken.
Heat 2 tablespoons olive oil in a heavy bottomed skillet (I use a cast iron).
Brown stuffed chicken about 1-2 minutes on each side then transfer in the oven and cook for about 15-20 minutes, flipping chicken halfway through.  Chicken is cooked when meat thermometer registers 155°F.  Set aside and let meat rest for about 5 minutes before slicing.

Make gravy (optional)
transfer skillet to stovetop and remove some of the fat if it is too much.
Mix 1 tablespoon flour and 1/2 cup chicken broth (and 1/4 cup apple cider or juice, if available). Pour mixture to pan and cook, stirring for 2-3 minutes until thickened.  

Serve sliced chicken with gravy.


Friday, March 2, 2012

Bacon-Wrapped Pork Tenderloin with Gravy

I made the most flavorful pork tenderloin.  I feel like I hit the jackpot on this one.  It's a no-brainer really unless you don't like bacon. But for my family, if not for health issues, we could eat bacon every day.  I've had a few flops with pork tenderloin.  Because it is a very lean piece of meat it is a little tricky for roasting.  Overcook it and it gets too dry.  I don't like dry meat!


So I experimented on wrapping it with bacon.  Not only does it add flavor to the meat but it also keeps it moist.  Think about that bacon fat dripping on the roast for a moment.  Convinced?

Oh yeah, I  found out at the last minute I needed kitchen twine.  I didn't have one so I improvised and put my brain to work.  It turns out interlacing the bacon does the trick.  Just make sure you are working with thin-cut bacon strips.  I used good old Farmer John's bacon in this roast.


Then because I was a little skeptical that it might come out dry I made gravy out of the pan juices.  It wasn't necessary but it did kick it up a notch.  In fact, when I had the left overs for lunch the next day I found out it was soooo good with rice!  

Here's how I did it.

Bacon-Wrapped Pork Tenderloin with Gravy

For the Roast
1 pork tenderloin (about 1.5 pounds), cut in half crosswise
6 thin-cut bacon strips
1 garlic head
1 teaspoon chopped fresh rosemary
8 sage leaves
Salt
Freshly ground black pepper
1 tablespoon olive oil
1 tablespoon grape seed or canola oil
Sea Salt and pepper to taste

For the gravy
1/2 cup apple cider (or dry white wine)
1/2 cup chicken broth
2 teaspoons flour


Preheat oven to 375°F

Cut garlic in half (crosswise) and place in a small microwave safe bowl.  Drizzle with the olive oil and a little salt.  Microwave until soft about 2 - 3 minutes.  When cool enough to handle, squeeze the flesh out from the head into a mortar and pestle.   Add the rosemary, then mash with the garlic.

Pat dry each tenderloin pieces with paper towels then rub with the garlic mixture.  Season with salt and pepper. 

Place sage leaves on top of tenderloin, about 2 on each side.  Wrap with bacon, overlapping and interweaving the end of one strip with  another.

In an oven proof skillet, heat a drizzle of grape seed or canola oil (or any oil with high smoke point) over medium high heat.  Brown the meat on all sides, turning carefully, about 2 minutes on each side.


Place skillet with the roasts in the oven and cook for about 20-25 minutes, or until cooked to desired doneness.  I cook mine to an internal temperature of 145°F.  Transfer roast to a platter and let it rest for at least 10 minutes before carving.


While the meat rests make gravy.  This is optional but adding gravy is a nice touch to the dish.  Drain all but about 1 tablespoon of oil from the skillet, making sure not to discard the brown pieces at the bottom.  Place skillet on the stove top over low heat.  Add cider and deglaze the pan, scrapping all the browned bits at the bottom using a wooden spoon.  Whisk in the flour with the chicken broth and add into the pan.  Let it cook 1-2 minutes stirring constantly until sauce is thickened.

Slice tenderloin into medallions.  Serve with gravy.

Tuesday, February 7, 2012

Ratatouille

I have been trying to train Sophia to sleep by herself.  I know.  It's a little late for that.  By the books I should have trained her to sleep by herself at 3 months old.  What was that called again? Ah, the cry it out method.  The thing is I never had the heart to do it.  And I never understood why in this country parents are so much in a hurry to separate with their newborns.  Not sleep training Sophia early on caused many sleepless nights for me but looking back, I don't regret those precious short moments when we cuddled and fell asleep together.  It was a nice treat after a long day of being apart.  It was the only chance I had to bond with her, and smell her sweet tiny head and baby breath.   I didn’t sleep the whole night next to her but those brief moments somehow made up for the lost times during the day.

So it does not surprise me that unlike most kids Sophia never dragged around a faded blanket or lovey.  Nor did she ever sucked on her thumb or a pacifier to soothe herself to sleep.  I was her lovey.   It was my presence that soothed her to sleep.  It was me that made her feel secured and comfy....  Let me just dwell on that thought for a minute.  Sigh.

But my little love bug is growing.  And I think the time has come for my darling to sleep on her own.   At first she refused saying, "Sleep next to me Mommy, I can't sleep without you."  That plea melted my heart  and made me want to give in.  But I realized I had to be firm.  Then the other night for the first time ever she wanted a lovey next to her.  She picked her favorite doll, the one which she refers to as baby sister.

Last night was the third night she fell asleep without me beside her.  I must admit, this new independence is harder for me than it is for her.

Ok, I'm getting teary eyed so let's move on to the next recipe...


Outside of the Filipino vegetable dishes I grew up eating, ratatouille is one of my new favorites.  I think it's because the flavor is sort of reminiscent to my all time favorite dish pinakbet.  I love the combination of eggplant, tomatoes and onions stewed together.  And this dish has the nice addition of sausage to make it into a complete meal.  

Ratatouille and Sausage

Olive oil
1 medium chopped onion, roughly chopped
1 teaspoon chopped garlic
3 medium sized zucchini, cut into 1/2-inch dice
1 small eggplant, unpeeled, cut into 1/2-inch dice
1 red bell pepper, cut into 1/2-inch dice
1/2 green bell pepper, cut into 1/2-inch dice
1 14oz can diced tomatoes
1/8 teaspoon red pepper flakes
kosher or sea salt
freshly ground black pepper
1 pound sweet Italian sausage
2 teaspoon chopped fresh thyme (or 1 teaspoon dried)
1 teaspoon chopped fresh rosemary (or 1/2 teaspoon dried)

Preheat oven to 400°F.

Heat a large oven-proof pan or dutch oven over medium-high heat.  Add 1 tablespoon olive oil.  When oil is hot, brown Italian Sausage on all sides.  Remove sausage and set aside.

Lower heat and in the same pan sauté onions until they begin to soften. Add garlic and continue to cook.

While the onions and garlic are cooking in low heat, heat 2 tablespoons in another skillet over high heat. When the pan gets hot, add zucchini and lightly brown.  Remove browned zucchini and add to the pan with the onions.  This step of browning the vegetables gives the dish more depth of flavor as opposed to just adding them straight without browning.

Repeat the browning process one at a time for the bell peppers, then the eggplant, adding the browned vegetables to the pan with the onions.  Add more olive oil as necessary but make sure not to add too much.  You only need a little so the vegetables do not stick to the pan.

Add the tomatoes with their juice to the vegetables.  Season with about 1-2 teaspoon salt and 1/4 teaspoon black pepper.

Add red pepper flakes and herbs and 1/4 cup of water.  Bring to a boil then place the sausages on top.

Transfer to the oven and cook, uncovered for 30 to 40 minutes.

A perfect side for this dish is a simple garlic parmesan bread-- cut a clove of garlic and rub it on slices of Italian bread.  Brush bread with olive oil and place in oven for 8 minutes. Remove bread from oven and sprinkle with parmesan cheese.  Return to oven and cook for 3 more minutes or until cheese melts.

Sunday, November 28, 2010

Thanksgiving Weekend

The Thanksgiving holiday sort of snuck up on us.  Last week I was eagerly waiting for it to come as I needed  a few days to catch up on sleep and some chores which were pushed aside when I got sick in the previous week.   All of a sudden it has come and gone... Nevertheless, we had a beautiful thanksgiving weekend so I cannot complain.  In fact I am very thankful in this holiday.  I have a beautiful family and we are happy and in good health.  I thank God every day for such blessings -- they are far more important in life than wealth and material things.  I am thankful that we have what we need.

Thanksgiving day was an all day buffet.  We did not get home until midnight and we were bloated from two parties we went to - his Mom's and my brother's.  At my mother-in-laws we enjoyed the traditional thanksgiving dinner: roast turkey, stuffing, green bean casserole, cucumber salad, ham, mashed potatoes, yams, cranberry sauce, and cheesecake.  There was plenty of food for a crowd of seven people so we get more food to take home. Yay!  My brother also prepared turkey but was accompanied by the usual Filipino food.  I don't remember each dish but there was also a lot of food there.

We skipped Black Friday shopping.  I think it's overrated anyway. I hate big crowds and how people get rude to get a hold of what they want. Also I do not have patience for long lines. Instead we took our dear daughter to see her favorite show on concert - Yo Gabba Gabba Live! As my husband says, "Pretty awesome to see Sophia so happy and excited, nothing could replace that. That was some of the best money I ever spent. DJ Lance Rock knows how to hype up the kids, let it never be said that there aren't any black superheroes!" I agree with him, I was almost in tears at the show seeing my daughter so happy... awed and almost speechless. It was such a wonderful feeling which made me forget about the $200 we paid for our tickets, not to mention the overpriced souvenirs we bought at the show.

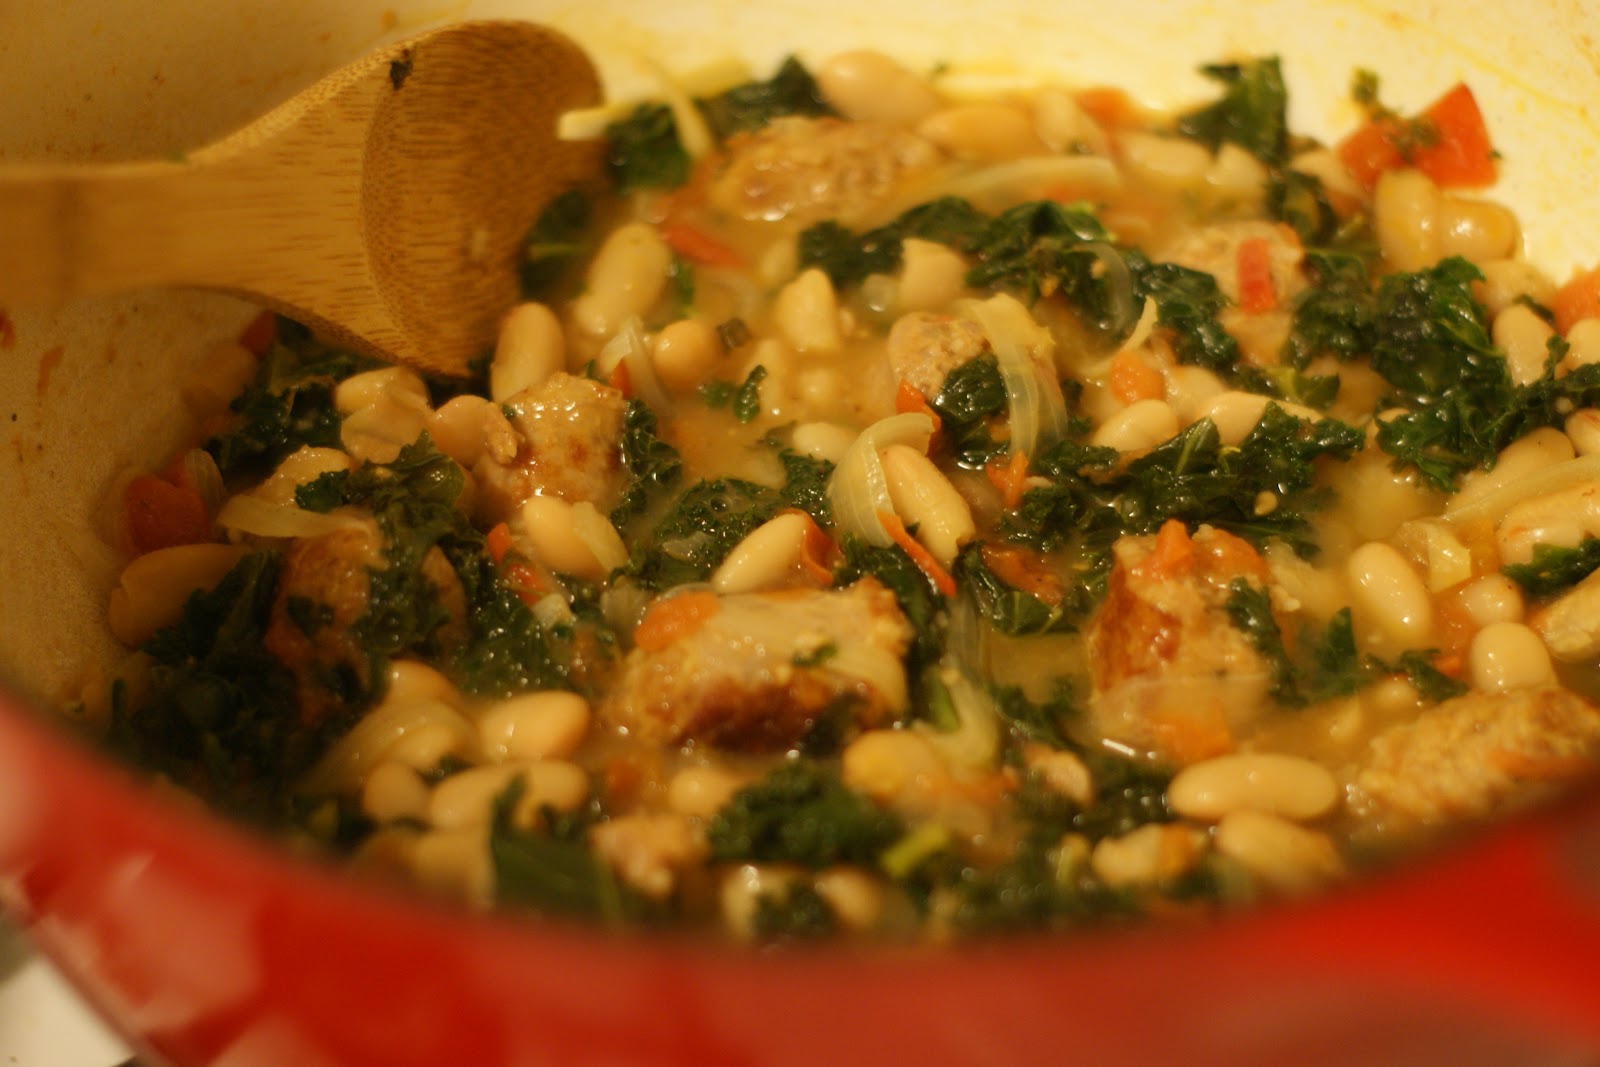
Saturday was laundry day.  We did four loads at my grandma's (we thought we could visit and wash clothes at the same time).  Still there's more left to do next weekend.  By the end of the day I was tired and don't have the energy for an elaborate weekend dinner.  We have eaten thanksgiving dinner leftovers the night before so I had to come up with something quick and easy and hence this dish.  This is my usual go to dish - all you need is canelini, kale and sausage and tada!... comfort in a bowl!


White Bean and Sausage Saute
5 Italian Sweet Sauge
2 (14 oz) canelini beans
1 bunch kale, coarsely chopped
1 onion, sliced
1 teaspoon fresh parsley
1 teaspoon fresh oregano
2 cups tomatoes, diced
2 garlic cloves, minced
3/4 cup chicken broth
2 tablespoons olive oil

There is my daughter's hand - couldn't wait to get the beans!
Heat olive oil in a heavy bottomed skillet over medium high heat.  Brown sausage on all sides.  When firm, slice them into medallions and add back into the pan along with the onions.  Saute until the onions are soft and clear and the suasage are cooked through and no longer pink on the inside, about 5 minutes, then add garlic and saute for a minute.

Add tomatoes and herbs then cook until the tomatoes start to disintegrate, about 4 minutes.  Add broth and bring to a boil, then simmer for 5 minutes.  Add kale and salt and pepper to taste.  Cook until kale are soft but still has some crunch to it, about 5 minutes.  Add beans and simmer for about 3 minutes.

Other variations of this dish:
Tuscan Bean Soup with Shrimp

Tuesday, November 16, 2010

Anytime Ribs

One dish I learned how to cook from my grandmother is her famous pork spare ribs.  It's always a hit at the 'buffet' table on our potluck gatherings.  It's nothing complicated, very simple in fact and as with every Filipino   we like to eat her version with rice.  The technique is simple, she massages the meat in garlic salt, black pepper, olive oil, a dash of worcestershire sauce and then she bakes it in the oven for about 2 hours at 350° heat.  Skip the barbecue sauce if you want to eat it Filipino style.  Instead serve it with rice and Filipino salsa -- a mixture of chopped tomatoes, green onions, & patis (fish sauce).

But since my husband is not a big fan of fish sauce I make mine with barbecue sauce.  I use store bought barbecue sauce although you could also make it from scratch.  Here are a few recipes that are worth trying:  Neely's BBQ SauceMark Bittman's Fast, Down Home BBQ SauceBasic Barbecue Sauce.

Even my 2 year old loves this and it comes out so tender she can bite it off the bone with only a few front teeth!  And the good thing about it really is that you can make it rain or shine.


Oven Baked Spare Ribs
baby back ribs or spareribs (about 1 pound per person)
your favorite barbecue sauce
4 cloves garlic, pressed (or garlic salt)
kosher salt
freshly ground black pepper
worcestershire sauce
extra virgin olive oil

Massage ribs with the olive oil, garlic, salt, pepper, & worcestershire sauce.  Cover and marinade 4 to 24 hours.
Heat oven to 350°.  Place ribs in roasting pan, cover tightly with foil and bake for 2 to 2.5 hours.  Covering the ribs in foil will create steam resulting in fall-off-the-bone tenderness.
Remove the foil cover and continue to cook for 10 minutes on each side to form a light sear on the outside.
Brush each side with barbecue sauce and cook for an additional 5 minutes on each side.

Other Rub Variations:

**Mark Bittman Rib Rub**
2 tablespoons paprika
2 tablespoons sugar
1 tablespoon salt
1 tablespoon ground cumin
1 tablespoon black pepper
1 tablespoon chili powder
- Stir all the ingredients together in a bowl, then transfer the mixture to a covered container. Keeps for at least one summer.

**Emeril's Southwest Dry Rub Recipe**
3 Tbsp. chili powder
2 Tbsp. paprika
1 Tbsp. cayenne
1 Tbsp. cumin
1 Tbsp. coriander
1 Tbsp. granulated garlic
1 Tbsp. granulated onion
1 Tbsp. kosher salt
1 Tbsp. cracked black pepper

**Bobby Flays Dry Rub **
1 tablespoon cumin
1 tablespoon paprika
1 tablespoon granulated garlic
1 tablespoon granulated onion
1 tablespoon chili powder
1 tablespoon brown sugar
2 tablespoons kosher salt
1 teaspoon cayenne pepper
1 teaspoon black pepper
1 teaspoon white pepper

Monday, November 8, 2010

The Classic Cold Medicine

I have been nursing a persistent cough since last week, the kind that leaves you gasping for breath after coughing up like ten times in a row.  I am not a big fan of cough syrups so I avoid them as much as I can.  Besides those cough & cold medicine doesn't really give much relief much else cure it.  So now the cough has turned into a really bad cold... the runny kind where you cannot bend down long enough or else all the water in your brain will flow out.  And not to mention the constant sneezing which is just annoying and so unladylike. Anyways I gave in to taking medicines, although nothing has brought me comfort except the smell of the vinegar I used to dip the pears I ate.  It smelled so good I slurped what was left in the bowl.  Back in the Philippines the best home remedy for colds was to simmer some local vinegar underneath your nostrils.  It clears congestion pretty good! I ought to give that a try later...

For now, a good ol' chicken soup sounds exceptionally good.

Chicken soup is nature's best cold and flu remedy, or for whatever ails you.  It must be the steam or the aroma from the spices, interestingly there's scientific evidence that there is truth to the tales that chicken soup has medicinal qualities.

There are many many different ways of making the classic soup.  My version is a slight asian fare, loaded with some greens and some Thai noodles.  I always like to add some sriracha and lemon at the end to make it a little pho-ish.


Chicken Soup

10 pieces chicken legs, bone-in, skin removed (preferrably organic-free range chicken)
1 tablespoon olive oil
1.5 quart chicken broth
water
2 stalks celery, sliced 1/4 inch crosswise
2 carrots, chopped
1/2 medium onion, chopped
1 tablespoon fresh ginger, chopped
2 cloves garlic, chopped
salt and pepper
1 jalapeno peppers, sliced (optional, i like mine hot)
1 napa cabbage, sliced 1/4 inch crosswise (separate the stems from the leaves)
1/2 cup fresh cilantro, coarsely chopped
1/2 cup cut fresh green onions
6 oz rice stick (thai style pasta)

  1. Rinse chicken legs and remove the skins.  Place chicken in colander to remove excess water.
  2. Heat a large heavy bottomed pan over medium-high heat.  Add the oil and soon as it starts to smoke, add the chicken legs.  Increase the heat to high and let chicken cook until no loner pink on the outside, about 10 minutes, stirring every few minutes making sure the meat does not stick to the pan. There should be very little liquid in it, you are basically cooking the chicken in its own liquid.
  3. Add salt & pepper, and garlic.  Cook for one minute then add ginger, onion, celery and carrots.  Cook further until the the vegetables start to 'sweat', about 5 minutes.
  4. Add the broth to the pan, adding water if it is not enough to cover all of the meat.  Bring it to a boil then lower the heat.  Simmer for about 30 minutes, or until the chicken in tender.
  5. Add the rice noodle and cook until soft, about 10 minutes depending on the thickness of the noodle you are using.  Thinner ones cook a lot faster.  At the last minute of cooking add the cabbage stems.
  6. Serve topped with cabbage leaves, green onions and cilantro.
  7. If you like it hot as I do, add sliced jalapeno and a dash of sriracha.  A bit of lemon or lime is also a good addition.

Tuesday, November 2, 2010

Beef Shiitake and Snow Pea Stir-fry

Traffic was pretty bad today so I got home later than I thought.  On my way home, I had to stop by the market to buy my groceries for the week.  I was supposed to marinade some meat and grill it for dinner but I  knew the meat will not have enough time to marinade.   Good thing that I had this prinout from Bon Appetit to the rescue - I was supposed make it for another night.  It looked very easy and I have a meat in the freezer which can be easily thawed for the dish.  I am so happy how it turned out that this will be now an addition to my go-to dinners.   It is very flavorful and perfect over steamed white or brown rice.  I specially like that the sauce have a good consistency without calling for flour as other stir-fry do.

Beef Shiitake and Snow Pea Stir-fry
yield: Makes 4 servings

active time: 30 minutes
total time: 30 minutes

1-2 pound beef chuck steak, cut into  1/4 inch thick strips
1 10 ounces snow peas (or asparagus, baby broccoli, or baby bokchoy)
4 green onions, sliced
1/2 cup fresh cilantro,  coarsely chopped 
12 ounces fresh shiitake mushrooms, stems removed and thickly sliced
1 tablespoon sesame oil
1 tablespoon olive oil
1 tablespoon fresh ginger, peeled and minced
5 tablespoons Hoisin sauce
2 teaspoon chili-garlic sauce
1/4 teaspoon Chinese 5-spice powder

Note:  I find it easier to cut the meat into thinner pieces when it is a little frozen.

Sprinkle beef with salt and pepper.
Heat a large skillet over medium heat.  Add sesame oil and heat.  Add ginger and mushrooms; stir-fry until mushrooms are wilted & tender, about 3 minutes (add a tablespoon of olive oil if mushrooms dry out and starts to burn).  Add beef to skillet; and stir constantly over high heat.  Cook until beef browns but is still pink in center, about 2-3 minutes.  Add snow peas, green onions and half of cilantro; stir-fry 1 minute.  Stir in hoisin, chili-garlic sauce, and five-spice powder.  Saute until peas are crisp-tender, 3-5 minutes.  Add salt and pepper to taste.  

Serve over brown or white rice. Sprinkle with chopped cilantro and green onions if desired.


Friday, October 29, 2010

Skillet Pork Chop with Mustard Sauce

To the Guy who Broke Into My Car Last Weekend,
You caught me by surprise.  I am amazed at how brave you are to rob my car, inside our apartment parking lot... and to come back for a second run the next day.

But actually I am sorry for you on all that effort, and for taking such a risk.  You see, I do not have much valuables in my car. I am probably just as broke as you.

I would like to thank you though, for even with an evil intention, you managed to give me some consideration.  Thank you for breaking the rear passenger vent window, instead of the bigger windows.  This makes it cheaper for me to have it replaced than if it were any of the bigger ones, or worse, the windshield!  I have to pay out of pocket to get it fixed so thank you for breaking in the cheaper way.  

I also would like to thank you for not stealing my daughter's car seat.  Really, I appreciate that you had concern for my baby riding a car without a safe seat.  You see, the car seat must have been the most expensive thing inside my car.   Thank you very much for leaving that behind.

So why did you not take it all the first time?  Did someone bother you in the middle of your business?  I wondered why you only took the face plate on my car stereo the first time.  You see, it does not really work without the whole thing. So I guess the pawnshop told you it's not worth any without the whole piece so you came back.  But sorry too, because even with the whole piece the darn thing does not work properly.  The FM is broken.  My guess is that the stereo is probably worth $10 all in all.  It's 7 years old.  Well hopefully my CDs, my cellphone charger & headphone and jacket will be worth something to make up for it.

I want to thank you too because after scattering my junk all over the place I finally had to clean up my car of all the nonsense - mapquest printouts (yes, I do not own a GPS) and other trash that does not belong there.  I have been meaning to do it for about a year but never got to it.  Now it's all organized and neat!

I ask you though not to ever come back again.  But if you do, please return the other pair of my shoe you took.  I really like those, and it's useless for either me or you to have only one of each.  And let me know so I can leave a door or a window open. I hate cleaning up those broken glasses, and I am too scared for my little girl to step on them.   Mostly it's a hassle to get things fixed and the repair is worth more than any of the stuff I keep inside.  Now I am more broke that I have to cut down on our dinner costs.

And so for dinner tonight I am making pork chop instead of steak.  But thank you too, dear thief, because it is a healthier meat and I really need to control my diet because my cholesterol level is borderline bad.  The pork chop actually came out really good.  Thanks to Mark Bittman, this is now my favorite pork chop recipe.

Skillet Pork Chop with Mustard Sauce
Serves 4
Time: 30 minutes

4 bone in pork chops, about 1 inch thick
sea salt & freshly ground black pepper
2 tablespoons olive oil
1/2 cup dry white wine
1 teaspoon minced garlic (or 2 tablespoons minced shallots, onion, or scallion)
1/2 cup chicken broth
1 tablespoon butter
1 tablespoon freshly squeezed lemon juice (or calamansi)
1 tablespoon dijon mustard
2 tablespoons capers
1 tablespoon Worcestershire  Sauce
coarsely chopped fresh parsley

Sprinkle the chops with salt & pepper.  Place a large skillet over medium-high heat for 2-3 minutes.  Add the 2 tablespoons olive oil; as soon as the first wisps of smoke rise from the oil, add the chops & turn the heat to high. Brown the meat on both sides, moving them around so they develop good color all over.  The entire browning process should take no longer than 4 minutes, and preferrably less.

Reduce heat to medium.  Add the wine and garlic (or shallots/onion/scallion) and cook, turning the chops once or twice, until the wine is all but evaporated, about 3 minutes.  Add 1/2 cup of chicken broth, turn the heat to low, and cover. Cook for 10 to 15 minutes, turning the chops once or twice, until the chops are tender  but not dry.  When done, they will be firm to the touch, their juices will run just slightly pink and, when you cut into them (which you should do if unsure of their doneness), the color will be rosy at first glance but quickly turn pale.

Remove the chops and set aside unto a platter.  If the pan juices are very thin, cook stirring and scraping the bottom of the pan, until the liquid is reduced slightly.  If the liquid is scarce (unlikely), add more broth or water; cook stirring and scraping the bottom of the pan, until the liquid is reduced slightly.  Then stir in the butter over medium heat; add the lemon juice, dijon mustard, worcestershire sauce and parsley.  Whisk well and pour sauce over chops.  Serve.

Note:  Alternatively you can use chicken thighs or pork tenderloin (cut in 1 inch thick medalions).  Chicken will need to cook a bit longer.  Pork tenderloin on the other hand will cook much quicker.

Saturday, October 16, 2010

Eat Kale, It's Good for You

Kale I think is a beautiful name.  I would not call any of my children by that name but if I had a cat, perhaps I would name her Kale.

In my 30ish I was introduced to kale.  I often see kale at the market but I never really know what to do with it.  I used to get intimidated by it - with it's unruly dark leaves, it appears to be tough and just looked plain ugly.  It was not until  my favorite food blog writer, now a columnist of bon appetit, wrote the article How I Learned to Love Kale that I took the courage to go buy bunches and experiment on sautéing it.  It was a hit at the dinner table and my husband said this could be my signature dish.  I was amazed how flavorful it turned out, and was surprised about its texture.  It was not tough at all, it was soft but it had a mild crunch to it.  One thing I like about it is that it does not overcook easily as other leafy vegetables.  In fact the longer it cooks, the more its beautiful flavor develops - earthy & sweet.  Since that day, I have cooked kale every chance I got,  after all it is very good for the health.

For the past few years kale has become more popular for its unsurpassed health benefits like lowering your cholesterol & lowering your risks for cancer.  I have heard Ryan Seacrest now & then talk about his kale juice on air.  I would like to try to make his concoction actually but I yet to develop the courage to drink it.

Anyway, to buy kale choose those that have firm, deep green leaves and moist hardy stems.  I try also to get the organic kind as much as I can since kale is one of those highly contaminated leafy vegetables.  Get the small sized leaves, they are more tender than the larger ones.  They are best when in season which is around winter time.


Kale Sauté
2-3 bunches of lacinato kale leaves, washed, stems removed & coarsely chopped
4 strips of bacon or 4 oz pancetta, chopped (optional)
2 cups chopped tomatoes, chopped
1 teaspoon tomato (paste)
1/2 medium onion, chopped
1 teaspoon garlic, thinly sliced 
salt & pepper
  1. Heat a big saute pan in medium heat then add bacon.  Cook until crisp. (If not using bacon, use olive oil).
  2. Add onions and cook until pieces becomes transparent, about 5 minutes.
  3. Add garlic and saute for about 1 minute then add tomatoes. Season with salt and pepper. Cook until tomatoes starts to disintegrate, about 5 minutes.
  4. Slightly increase heat and add kale.  Cover. After 2 minutes mix & flip the top leaves to go under.  Do this until the leaves are slightly wilted.  Add tomato paste if using.  Lower heat and cook for about 10-15 minutes, stirring constantly until the leaves are tender yet still crisp. There should be enough liquid from the tomatoes & kale but if it dries out before your desired doneness you may add water by tablespoons.

Friday, October 15, 2010

On a Soft Food Diet

I have been nursing a post oral surgery toothache and boy, it's been tough!  Although I did not expect it to be easy, wisdom teeth (all four!) extraction is one hell of a pain.  The procedure is not bad at all, but the recovery is a big discomfort.  But I am not complaining too much of the pain,  it's really about not being able to eat.  I miss eating a big chunk of meat and things crunchy.  I have not have a substantial meal for days now, making me weak and less able to think clear.  Yesterday I got ambitious and tried to chew on dumplings and little chopped pieces of chicken, and the next day the pain got even worse.  So today I went back to eating soft foods and I am glad there is a recipe called congee to help me get by.  Back in the Philippines my Uncle Ben used to cook this kind, we called it arroz caldo.  He would take a chicken from the backyard, butcher it and make one big pot of arroz caldo for all of us neighbors to share.  The chicken & rice would be simmering for hours, and although the chicken pieces is very few compared to the rice in the dish somehow I remember it to be the best I have ever had.  I remember how comforting it smelled, as if any pain or problem just melted away as my Aunt poured it into our bowls.... and that is what was in my thoughts as I cooked my quick & easy version.  It is a far cry from my Uncle's arroz caldo but it is good enough.  Besides if you are this sick and uneasy, it is really hard to make it though the long process to make the real congee.

Rice Porridge (Congee)
Serves 2

  • Boil 5 cups of good chicken stock.  Get the best you can find, preferrably the organic free-range kind.
  • Add 2 teaspoons of grated ginger.  Freezing a fresh ginger then grating it makes it so much easier.  Plus this is a good way of saving the rest of a big piece of ginger.
  • Add 1 cup long grain rice and bring to a boil. Stir and reduce heat.
  • Cook covered for about 1 to 1 1/2 hours at a bare simmer until it has the consistency of an oatmeal, stirring once in a while and more often towards the end.
  • Add water or more chicken stock to thin if necessary.
  • Serve topped with 1 teaspoon of Asian Sesame Oil, chopped green onions, and shredded chicken and/or poached or soft boiled egg.  For a perfect soft boiled egg,  cook egg in water at a BARE simmer, just when there there are little bubbles in the water, for about 10-12 mins - the whites will set but very soft.  Even easier is to simply crack the egg on top of the porridge and let it cook while it is still steaming hot.

Monday, October 4, 2010

The Best Roast Chicken, IMO

After a week of extreme hot weather here in Southern California with temperatures up to 109° , we finally got a break and now feeling a bit of autumn in the air.  It's gray outside, and the weatherman says there's a 10% chance of rain.  It is a good day for roasting chicken.


I have an organic free range chicken brining in the fridge for a couple of days now, and I couldn't wait to hear it sizzling in the oven. Ever since I stumbled on this recipe I have been obsessed by it.  It's called the Simplest Roasted Chicken as adopted from the Zuni Cafe Cookbook. Zuni Cafe is based in San Francisco.  I have not eaten there but I suppose they are known for delicious roast chicken. I do not own the book either, but I read over at seriouseats.com that the full recipe (including a bread salad) is about 4 3/4 pages long.  Whoa!  Well, I am glad I found a short version first.  An easy to follow one over at seattlest or I'll be completely intimidated and just settle on buying my roast chicken at Costco.  


I have tried several Roast Chicken recipes but none come close to be as good as this one.  I was not happy with the results.  They didn't brown as beautiful and were not as succulent.  I have almost given up on roasting chicken, but I thank my angels for helping me find the way.  I was so proud of myself that day I first cooked this for dinner - out from the oven it was beaming with it's beautiful color and indeed it was finger lickin' good!    Having been so impressed by it, I googled Zuni Cafe Roast Chicken  and holy molly - people are crazy for it, it's a religion!   Basically, I'm late to the party but what the heck, I am going to blog about it anyways and join its many many fans.


The technique is not rocket science - small bird, seasoning the chicken in advance and high heat. However I have tried it with a bigger bird, upto 4 1/2 lbs and still it came out as good.  Of course you just have to cook it longer, 1 hr 10 minutes total for a 4 1/2 lb chicken.


Zuni Cafe Roast Chicken

One small chicken, 2 3/4 to 3 1/2-pounds (or upto 4 1/2 pounds)

4-6 tender sprigs fresh thyme, marjoram, rosemary or sage, about 1/2 inch long
about 3/4 teaspoon of sea salt for every pound of chicken
3/4 to 1 teaspoon freshly cracked black pepper

optional : insert 1 whole garlic and 1 lemon cut in halves


method 
     Season the chicken with salt and pepper about 1 to 3 days before roasting.
  1. First remove any giblets & fats inside cavity. Rinse the chicken then dry thoroughly inside and out with paper towels. (The drier it is, the better. More moisture means more time steaming before it starts browning.) 
  2. From the edge of the cavity, slide a finger under the skin of each breast to make little pockets. Slide a sprig of each herb inside each pocket and put remaining sprigs inside cavity. 
  3. Season the chicken liberally all over with salt & pepper, massaging and concentrating more on the meaty parts than the bony parts. Sprinkle also some salt inside the cavity. 
  4. Place chicken in a square dish, cover and refrigerate for up to 3 days. 
  5. Preheat the oven to 475°F. Choose a shallow flameproof roasting pan or dish barely larger than the chicken (so that there is not much room for the fat to burn in). For my case, I choose a 10-inch cast iron skillet to do the job. 
  6. Preheat the pan on the stovetop over medium heat. Dry chicken with paper towels, and place in hot pan breast side up. It should sizzle! 
  7. Place pan & chicken inside the oven. The chicken should start browning within 20 minutes. If not increase the temperature by 25° . The skin should blister, but if the chicken begins to char or the fat is smoking reduce the temperature by 25°. After 30 minutes gently turn the bird over. Roast for another 10 to 20 minutes depending on size (for 4 1/2 pound, 30 minutes). Flip back over breast side up to re-crisp about 5 to 10 minutes (10-15 minutes for 4 1/2 lbs). 
  8. Remove the chicken from the oven and transfer to a cutting board or platter. Rest for at least 10 minutes before cutting into pieces to allow its juices to redistribute back into the tissues. 


Note: Some reviewers of this recipe complained about too much smoke when cooking in this method. One solution which worked for me is adding potatoes around the chicken, in the open space around it to soak up the fat so it does not burn. I use fingerling potatoes but you can also use thinly sliced disks of russet potatoes.  Add the potatoes when you turn the chicken breast side down. I suggest precooking the potatoes in the microwave for 2-3 minutes before adding to the pan.


Now, if you find yourself short of a day to salt in advance this recipe is also worth a try.
Related Posts Plugin for WordPress, Blogger...